We’re finally down to the last post of our series on creating full-fledged adventures from adventure seeds. Up to this point, we’ve chosen our idea, asked and answered questions about it to flesh out the necessary details, and determined what events we need to create. Now it’s time to create our adventure outline.
Organize Events
Now that we have our list of events, we need to pull them together into a step-by-step plan. We need to take each of the events we created part 8 and put them together into a single adventure plot line.
For this step, you need to be able to move your events around. Index cards are extremely helpful for this. Write each event on a separate index card. Then lay the cards out on the table or floor (somewhere you have plenty of room to maneuver). What events logically belong together? Which events need to come first? What events are caused by other events? Shuffle events about until you come up with an order of events you like and that makes sense.
Write Flowchart/Outline
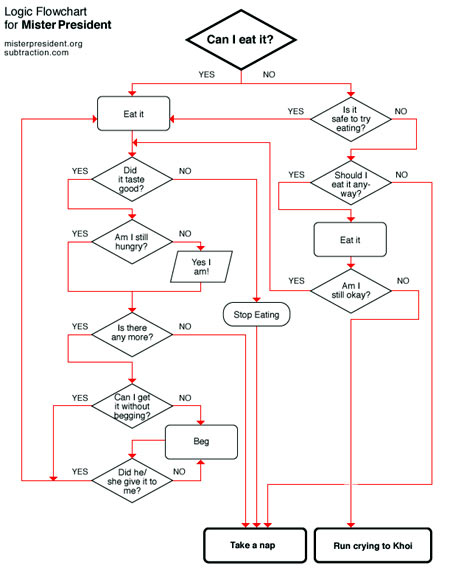
Write this order in an outline or flow chart format. To write a flow-chart, place your first event in a box at the top of the page. Draw arrows pointing away from this box, one for each possible action the PCs could take. At the end of each arrow, draw a box and write the event that will result from that action. Repeat for each event you have until you reach your final event.
Sometimes there are multiple actions the PCs could take to arrive at a particular event, or an event farther down the chart could lead back to an event listed earlier. Connect these events with arrows, labeling each arrow with actions the PCs could take.
With a flow chart, if your players miss an event, or skip to one further down the chart, you can jump to that point and see instantly if they’ve missed any crucial events or information You can then improvise a way to lead the PCs back to the events they missed Creating a flow chart can also help you see if there are any “holes” in your adventure. These usually come in two types:
- Dead-end events that serve no useful purpose. Throw these out.
- “Orphan” events that are important, but nothing leads to them.
You may find you don’t know how to get from one event to another. For now, just put an empty box in the flow chart to represent these missing steps. You’ve got a couple of ways you can fill this box:
- Brainstorm until you come up with something to tie the events together, perhaps using a mind map.
- Run the adventure and hope your PCs think of a way to get from one event to another.
Which method you use depends on how creative your players are and how comfortable you are with improvising. It often helps to wait until you’ve outlined the rest of the adventure, then come back and fill in these blank spots. Solutions may come to you as you work.
Some GMs can run with just the flow chart, others will need to write out their adventure in detail. No one way is better than the other. If you need to write out the adventure before you run it, by all means, do so. This step comes after you create your flow chart. Even a GM who runs well “off the cuff” will need notes on locations, monsters, and NPCs.
Use this flowchart as a guide. Be aware that your PCs will probably change the order of events. Still, it’s good to have an idea of at least one way through the adventure. This way, you can drop hints and add or subtract events to get players back on track, should they run off on a tangent that takes them completely away from the adventure.
[Flow chart courtesy of  hahatango via Flickr Creative Commons 2.0]


2 responses to “Creating the Adventure Outline: Using Adventure Seeds/Hooks/Starts/Ideas, pt. 9”